Adding a list web-part from another site

Visit our website to find out more useful solutions and services from Chiron IT https://chironit.com
Sometimes there might be a need for Adding a list web-part from another site in SharePoint. By default, you can insert lists and document libraries to pages just in scope of one site but today I would like to show you how you can put the list or doc library from a parent site or a subsite to another page.
Important! The method described here will work just in the scope of one site collection.Also, you should have access to the root site collection site.
So, let’s review step by step guidance on how to add a list web-part to another site:
1. First step
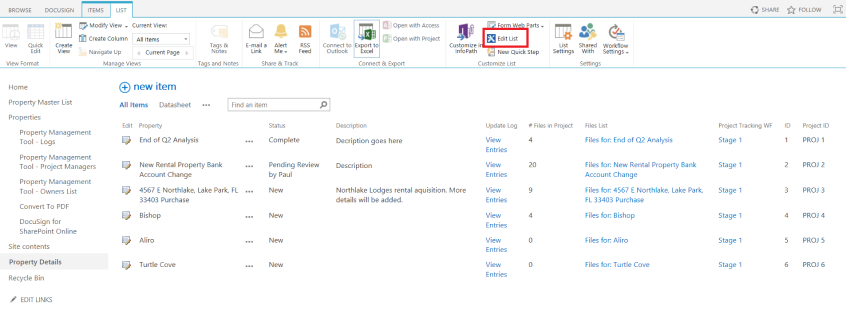
- Open the list or document library you would like to insert to another site in the browser
- Click on List tab
- Click on “Edit List”
- Sharepoint Designer will be opened
2. Second step
- In SharePoint Designer right click on the list view you would like to display on another site and choose “Edit in Advanced mode”.

- In the top ribbon of SP Designer click on the “Insert tab”
- Click on the “Data View” and choose the same list/library you are working with
In my case, it’s “Property Master List” list

- After you added a data view you will see that there are 4 green tabs were added to SP Designer top ribbon
- Click on the “Web Part” tab and choose “To site gallery”

- Name your web-part with the name convenient for you, set properties if needed and click “Ok”

- Click “Yes” for the appeared prompt
3. Third step
- Go to the site where you want to insert the list view web-part (remember it should be the same site collection where the source site located)
- Edit the page where the list web-part should be placed and click on “Add web-part” if you user web-part page or click on “Insert” tab and “Web-part” button if you are on Wiki page

- You will see the list of available web-parts.
- Click on “Miscellaneous” category and find the list view web-part you created.
- You can add it to the page
- All DONE!

I would appreciate if you like and share this article if you found it helpful.
Check out the latest articles


Have questions?
Contact Information
I'd love to connect. Here's my calendar link to make finding time easy.
Schedule a call